My boat came without a tiller. I investigated purchasing one, but the cost was prohibitive (about $170, unfinished) so I decided to attempt building one from available remnants. I had some very hard, dense oak from an old pallet, and some teak left over from this boat.
The usual woods used for tiller construction are mahogany and ash, because they are hard woods with a pleasing contrast in wood hues, and although I wanted contrast in the wood laminations, I also wanted to minimize cost. I decided that the teak and oak at hand provided sufficient contrast and strength.
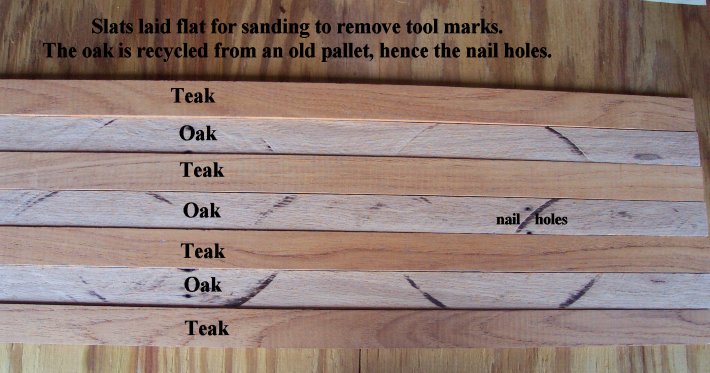
Using a table saw, I cut the stock to width plus 1/16", to allow for subsequent sanding. Next, I cut the stock into slats. To determine the thickness of of each slat, convert your desired tiller height into 16ths, and divide by the number of laminations you want. It would have been preferable to shave the slats to thickness with a planer but I don't have one, so after cutting, I laid the slats flat and sanded them smooth to remove tool marks.
This photo shows them before sanding, with the marks from the table saw blade clearly visible. There would be four slats of teak and three slats of oak. Since the oak is recycled from a pallet, there are a few nail holes evident.
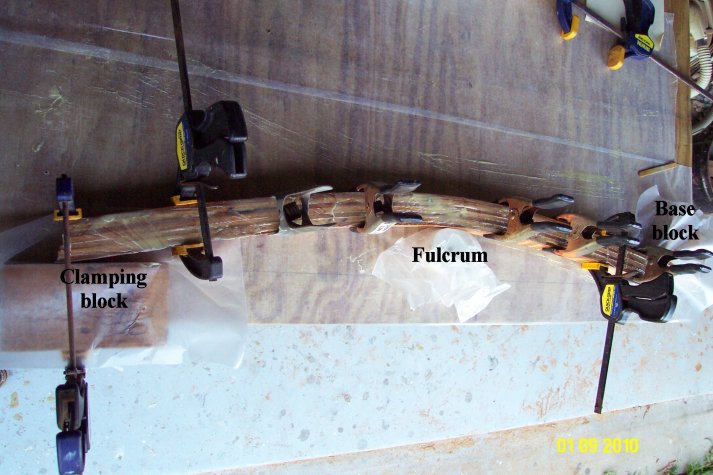
Thanks to TartanSailor of CDSOA, I knew the length and the chord of the arc for the tiller. For the form, I used a sheet of 3/4" plywood and screwed three 2x4 blocks to it. One block restrained the base of the tiller, a center block (rounded) provided a fulcrum for the chord, and the third block provided an anchor for the clamp to 'pull' the wood slats into the required bend. I covered all surfaces with waxed paper so the epoxied slats would not adhere to the form.
I coated the mating faces of the slats with thickened epoxy, stacked and aligned them, put them on the form and clamped them. I removed the squeeze-out before the epoxy hardened to minimize later sanding. In this photo, it is difficult to see the blocks because of the waxed paper covering them.
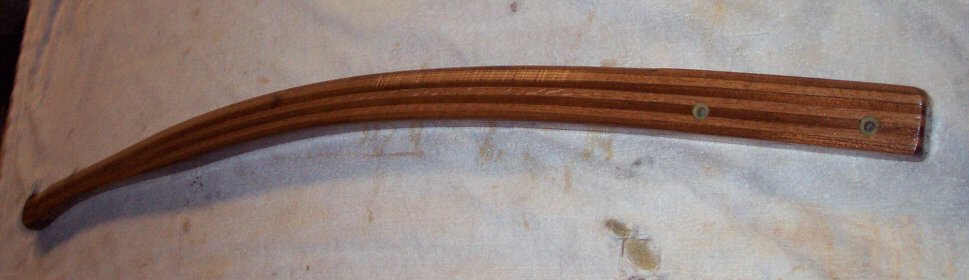
After curing, I removed the tiller from the form, sanded the excess epoxy with a belt sander, rounded the edges with a router, and trimmed the handle end with a band saw. After more sanding with random orbital and palm sanders, I began to apply the finish. Here is a preliminary photo after finishing has begun, but before it is complete.