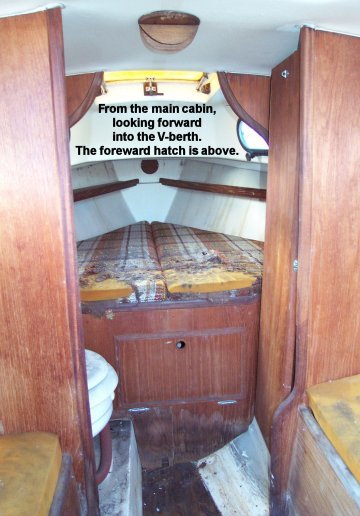
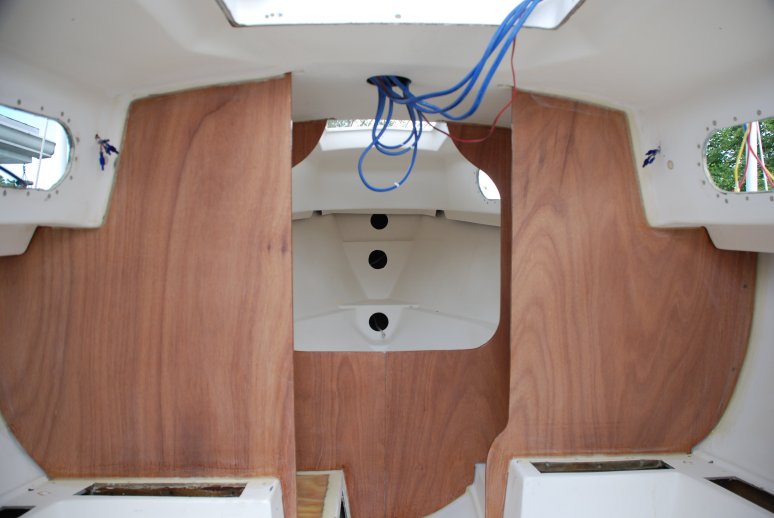
Here you see the condition as received, where even the plywood inspection cover beneath
the mast step overhead had delaminated, hanging in curls.
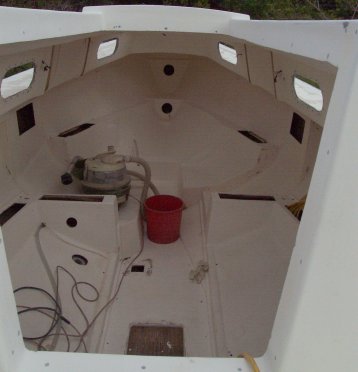
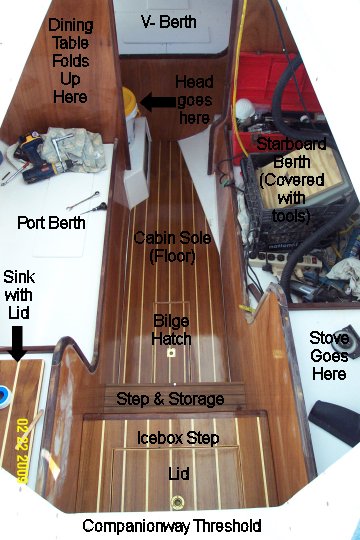
Compare that to the condition to date. I have removed everything from the boat, scrubbed thoroughly, and stripped all adhesives and sealants. The vacuum cleaner sits where the head was. I dreaded and avoided removing the bulkheads, but as difficult as it was, it was both necessary and prudent.
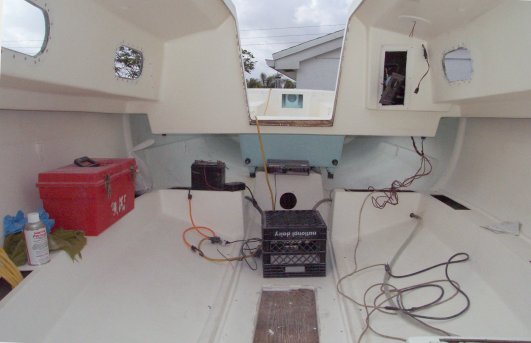
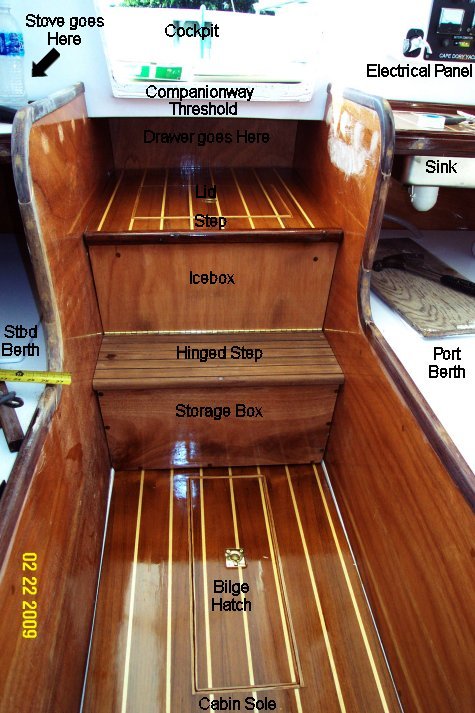
Here is the same view, facing aft toward the companionway.
Upgrading the head requires a lot of thought, a good bit of money, and considerable time, because the original installation (with direct discharge overboard) is now illegal and a holding tank is required.
After deciding whether or not to even install a head, the first two questions are: How big a tank, and where to put it? I decided the best location was behind the head, like a toilet tank. This has three advantages: It doesn't utilize existing storage space, it is close to the head to minimize plumbing, and it is above the waterline and thus doesn't need a vented loop in the discharge line.
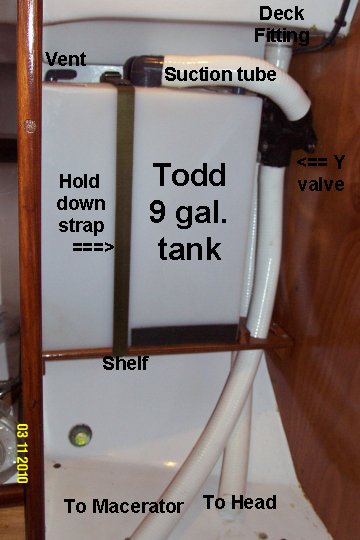
The space at this location limited the size of the holding tank. It also limited the orientation of the tank. I didn't want to cut additional holes in the tank to relocate openings, so I elected to intstall a draw tube in the suction line, which reaches to the bottom of the tank to evacuate it.
To provide the option of dockside pump-out, and/or legal offshore overboard discharge, a deck fitting, a 'Y' valve, and a discharge pump are required. I decided to use a self-priming macerator pump because it is more compact.
The following photo shows how the installation is proceeding. The hose from the
head to the tank is hidden behind the suction tube. The 'Y' valve allows you to
empty the tank by selecting dockside pumpout via the deck fitting, or overboard discharge via the macerator.
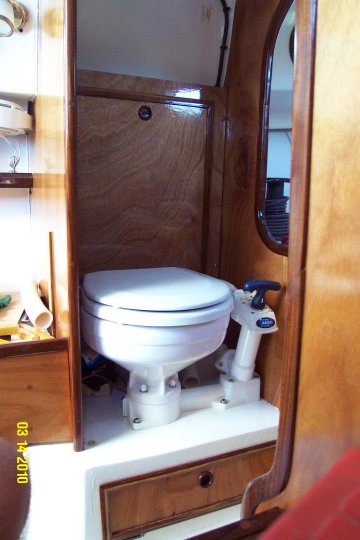
Here is a photo showing the installation of the holding tank cover and head, for a check of fit and finish. The plumbing and wiring is not yet complete. The tank cover has a door to allow access to the tank and the 'Y' valve. The macerator is just visible on the left behind the head.
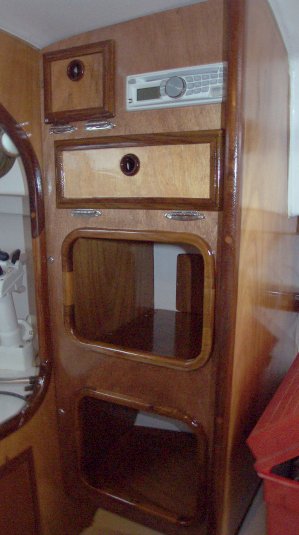
Another cabin improvement is in the same hull section, on the starboard side directly across from the head where a closet was located. On the Cape Dory Sailboat Owners Association message board, I asked members what improvements they would most like on their boats. A repeated suggestion was shelf and storage space. Thus, I decided to convert the closet into a cabinet, which includes a stereo and CD storage space. I was careful to space the shelves to allow access to the inspection cover for the chainplates. Here is the result of CDSOA member recommendations:
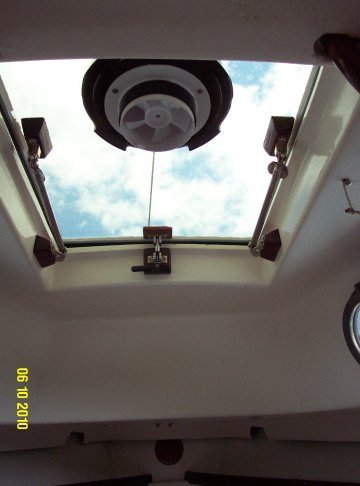
Here is a view of the forward hatch from the interior. This is the original hatch, but modified. Originally, a center square of the cast fiberglass hatch had no gelcoat, thus creating a translucent patch to admit light into the forward V berth. Time and the elements had degraded the unprotected fiberglass, so I cut it out and replaced it with 3/8" acrylic. Although it looks clear in this view, it actually has a smoke-bronze tint. Mounted in the hatch is a 4" solar/battery powered Nicro ventilator.