In anticipation of replacing the old foam mattresses with new, and then fashioning covers for them, I bought a used Sailrite LSZ-1 sewing machine. Since all of the woodwork onboard is now finished, I decided it was time to convert my shop into a sewing loft. I did this by constructing two tables of 4'x 8'x 1/2" plywood, joined by a shorter piece 2'x 6'x 1/2". This makes the finished table 10' by 8', with a cutout in the middle for the machine and for me. This table should be large enough to handle any sewing task. In the cutout, I built a shelf to hold the machine so the deck of the sewing machine is flush with the table top. This will make it easier to 'feed' large and bulky material into the machine.
The plywood surface offers big benefits. I can easily cut fabric on it using a razor blade, and I've drawn outlines of all four mattresses with a sharpie so I can use the outlines to cut fabric for the covers and fitted sheets. In all, the tables cost about $80 in materials. Since the tables are only screwed together, when this project is finished, I can simply disassemble them and re-use the lumber on another project at another time.
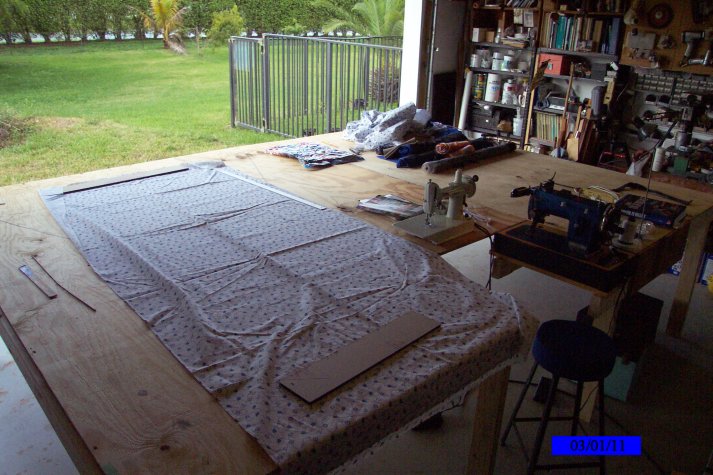
Here is my loft:
Since I have ZERO experience as a seamstress, I started with a simple project of making a custom cushion for my plywood stool seat. You can see it in the photo above.
That went well, albeit slowly, so I made fitted sheets for the boat cushions using the small portable machine you see. You can see the fabric spread out over the outline for the starboard berth. That went well, so I graduated to making curtains, drapes, and screens. Then I tackled the mattress covers with the Sailrite LSZ-1, which also went well. I'm beginning to agree with Don Casey, that sewing is actually easy, and mistakes are easily corrected with a seam ripper (ask me how I know!)I solicited estimates for a new mainsail and a genoa. The estimates for what I wanted were in the $2500 range. I also got an estimate from Sailrite, which was just over $1000. Sail kits were a daunting prospect since I am a novice with a sewing machine, but a lack of experience hasn't stopped me with any other aspect of this restoration. Why should sails? Within 2 weeks I had two kits from Sailrite for $1070 delivered, thanks to their spring sail sale.
Below is a photo of the mainsail kit, as received. The panels are spread out on the table. The necessary materials and hardware are in bags on the right. The kit contains everything you will need, except for the machine, and in my case, I had to buy a #1 die set and a #9 die set needed for installing the included grommets.
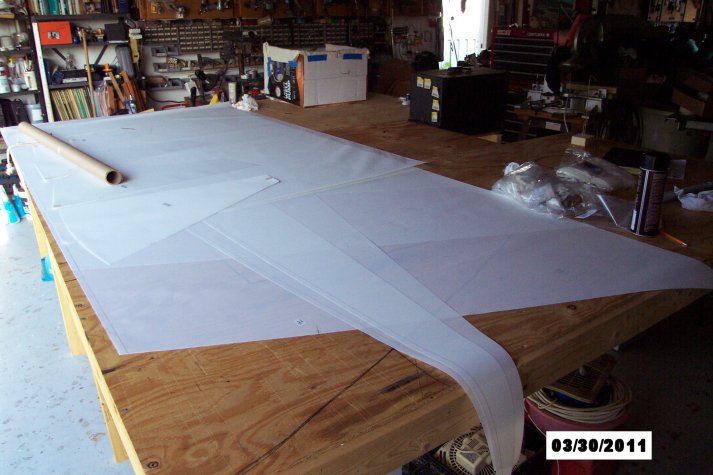
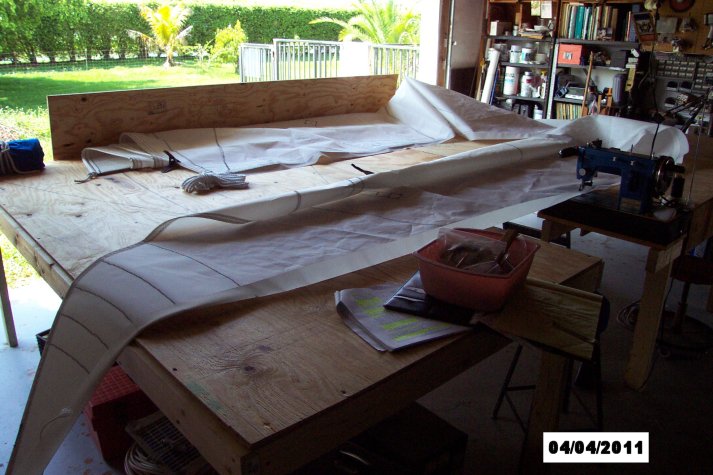
All of the panels are well plotted, marked, and cut. The instructions were well written, thorough, and illustrated. Any questions which arose in my mind were easily answered on Sailrite's YouTube channel. The largest problem I faced was a table that is woefully small (10'x8') for a project this big. The following photo shows how I coped with this problem, but constantly re-adjusting the sail as I sewed slowed me down and created creases and wrinkles in the sailcloth. The plywood leaning against the table is a wind-break, to keep the breeze from lifting the sail edge as I worked.
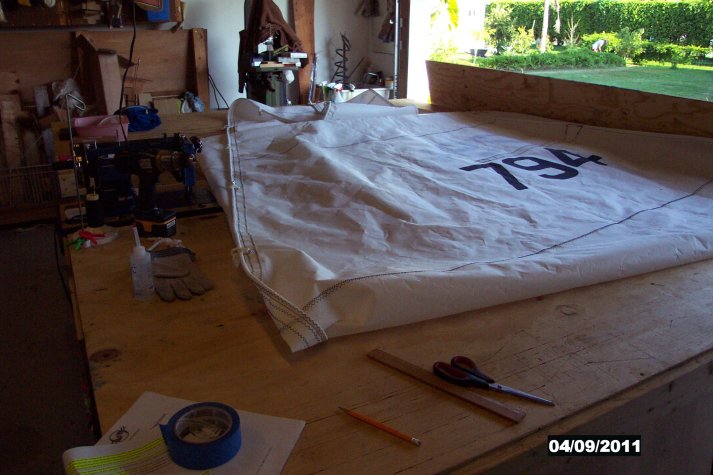
I now understand why there are sailmakers: Because if this was easy, everyone would do it. Truthfully, Sailrite makes this as easy as it can be, and I am very impressed with their kit and the result. Below you see the finished mainsail, just after I applied the numbers. I used black thread because Don Casey says it endures the elements significantly better than white thread. Eric Grant of Sailrite warned me that any sewing flaws would be much more noticeable, and that is true... my stitches do 'waver' a bit for example, but I chose to go for longevity over looks. In the end, these minor cosmetic flaws aren't really that apparent and will not adversely affect the function or durability of the sails.
The mainsail has 4 partial battens, two reef points, and a leech line. It took about a week to build. The genoa is larger, has a leech line, continuous support tape on the luff, and a sacrificial cover on the leech and foot. It also took a week to build. The Sailrite LSZ-1 performed very impressively, aside from operator error, such as forgetting to re-load the bobbin before attempting a long seam. Like everything, you learn as you do it.
Here is a photo of the genoa:

In retrospect, I would suggest that this project is within the realm of any reasonably capable do-it-yourselfer (thanks to Sailrite and their kit) ... the caveat being that you need space... the more, the better, to handle the sheer bulk of sails. The less space you have to work, the more frustrating the work will become.
Sailrite's instructions are more thorough for those sails they sell more of, because they update their instructions as feedback is received. The
instructions for my mainsail were very detailed, but the instructions for the headsail (Genoa) were less complete and resulted in questions. The
nice thing is, the answer to any question you have is only a phone call away from their pro designer, Jeff. This is a big comfort.